Introduction
Before diving into more advanced topics in ROS 2, it is essential to understand the basics of node names and namespaces. While this tutorial is brief, these concepts are fundamental to organizing and managing your robotic applications effectively.
ROS 2 Nodes and Names
In the first ROS tutorial, we saw that nodes are the basic computational units in ROS 2, each handling a single modular task like sensor data publishing or motor control. Each node is identified by its name, and multiple nodes can be grouped under the same namespace.
Node Names
Node names uniquely identify nodes within the ROS graph to prevent conflicts. By default, the executable name becomes the node name, but you can assign a custom name to each node by remapping it using --ros-args -r __node:=new_name.
For example, running:
ros2 run demo_nodes_cpp talker --ros-args -r __node:=my_talker
changes the node name from /talker to /my_talker.
This is useful for distinguishing between multiple instances of the same node type. For example, on a robot with multiple cameras, you might use the following names for the same camera node type:
/camera_front/camera_back/camera_left/camera_right
Namespaces
Namespaces provide a prefix for node names, topics, and services, enabling the isolation typically required in multi-robot systems or when a robot is equipped with multiple components of the same type. Namespaces are prepended to relative names and set via --ros-args -r __ns:=/namespace_name.
For example, a node with the namespace /robot1 and the name sensor becomes fully qualified as /robot1/sensor.
Practical Example
Launch two identical publishers with different namespaces.
Open a terminal and enter:
ros2 run demo_nodes_cpp talker --ros-args -r __ns:=/robot1
Open a second terminal and enter:
ros2 run demo_nodes_cpp talker --ros-args -r __ns:=/robot2
Now open another terminal to observe the system:
-
Run
ros2 node listto see the active nodes:ros2 node listThis shows the namespaced nodes:
$ ros2 node list /robot1/talker /robot2/talker -
Run
ros2 topic listto see the active topics:ros2 topic listThis shows the namespaced topics:
$ ros2 topic list
/robot1/chatter
/robot2/chatter
[...]
The two talker nodes publish messages on the same chatter topic, but each within its own namespace. This allows you to know exactly which node is publishing which message, enabling you to subscribe to them individually without conflicts or errors.
You can now launch a listener node to receive messages from one of the talker nodes, ensuring it operates within the same namespace.
For the robot1 namespace:
ros2 run demo_nodes_cpp listener --ros-args -r __ns:=/robot1
For the robot2 namespace:
ros2 run demo_nodes_py listener --ros-args -r __ns:=/robot2
It is not mandatory for the subscriber node to operate within the same namespace as the publisher node. There are situations where this setup is not ideal, such as when a single node monitors the status of multiple robots.
In such cases, you can use fully qualified topic names to subscribe to the desired topics by using topic name remapping instead of node namespace remapping.
To subscribe to the chatter topic of the robot1 namespace from another namespace:
ros2 run demo_nodes_cpp listener --ros-args -r chatter:=/robot1/chatter
To subscribe to the chatter topic of the robot2 namespace from another namespace:
ros2 run demo_nodes_cpp listener --ros-args -r chatter:=/robot2/chatter
Visual Graph Introspection
When the ROS 2 graph is running, you can visualize the nodes and their connections using tools like rqt_graph. This tool provides a graphical representation of the active nodes, topics, and services, making it easier to understand the system’s architecture.
To use rqt_graph, run the following command in a terminal:
ros2 run rqt_graph rqt_graph
or simply:
rqt_graph
This opens a new window displaying the current ROS 2 graph. You can see the namespaced nodes and their connections, helping you identify how data flows between different parts of your robotic system.
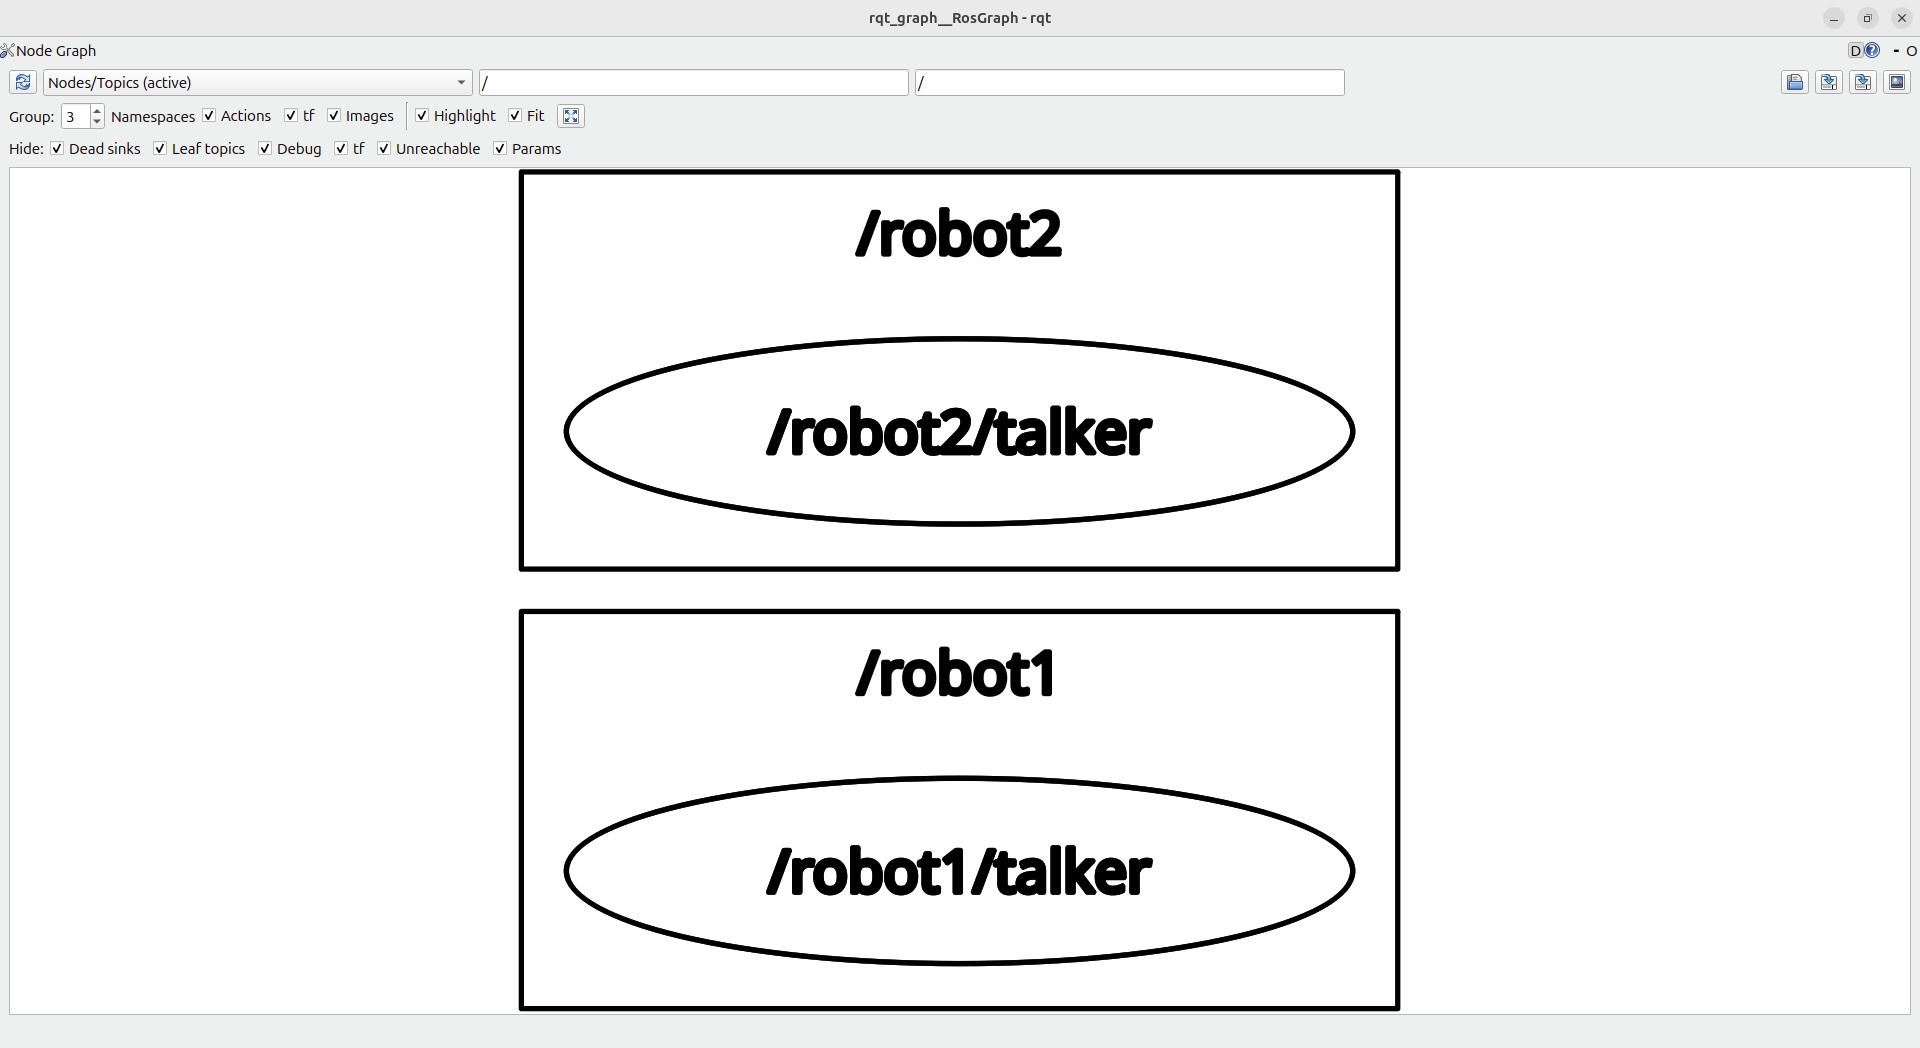
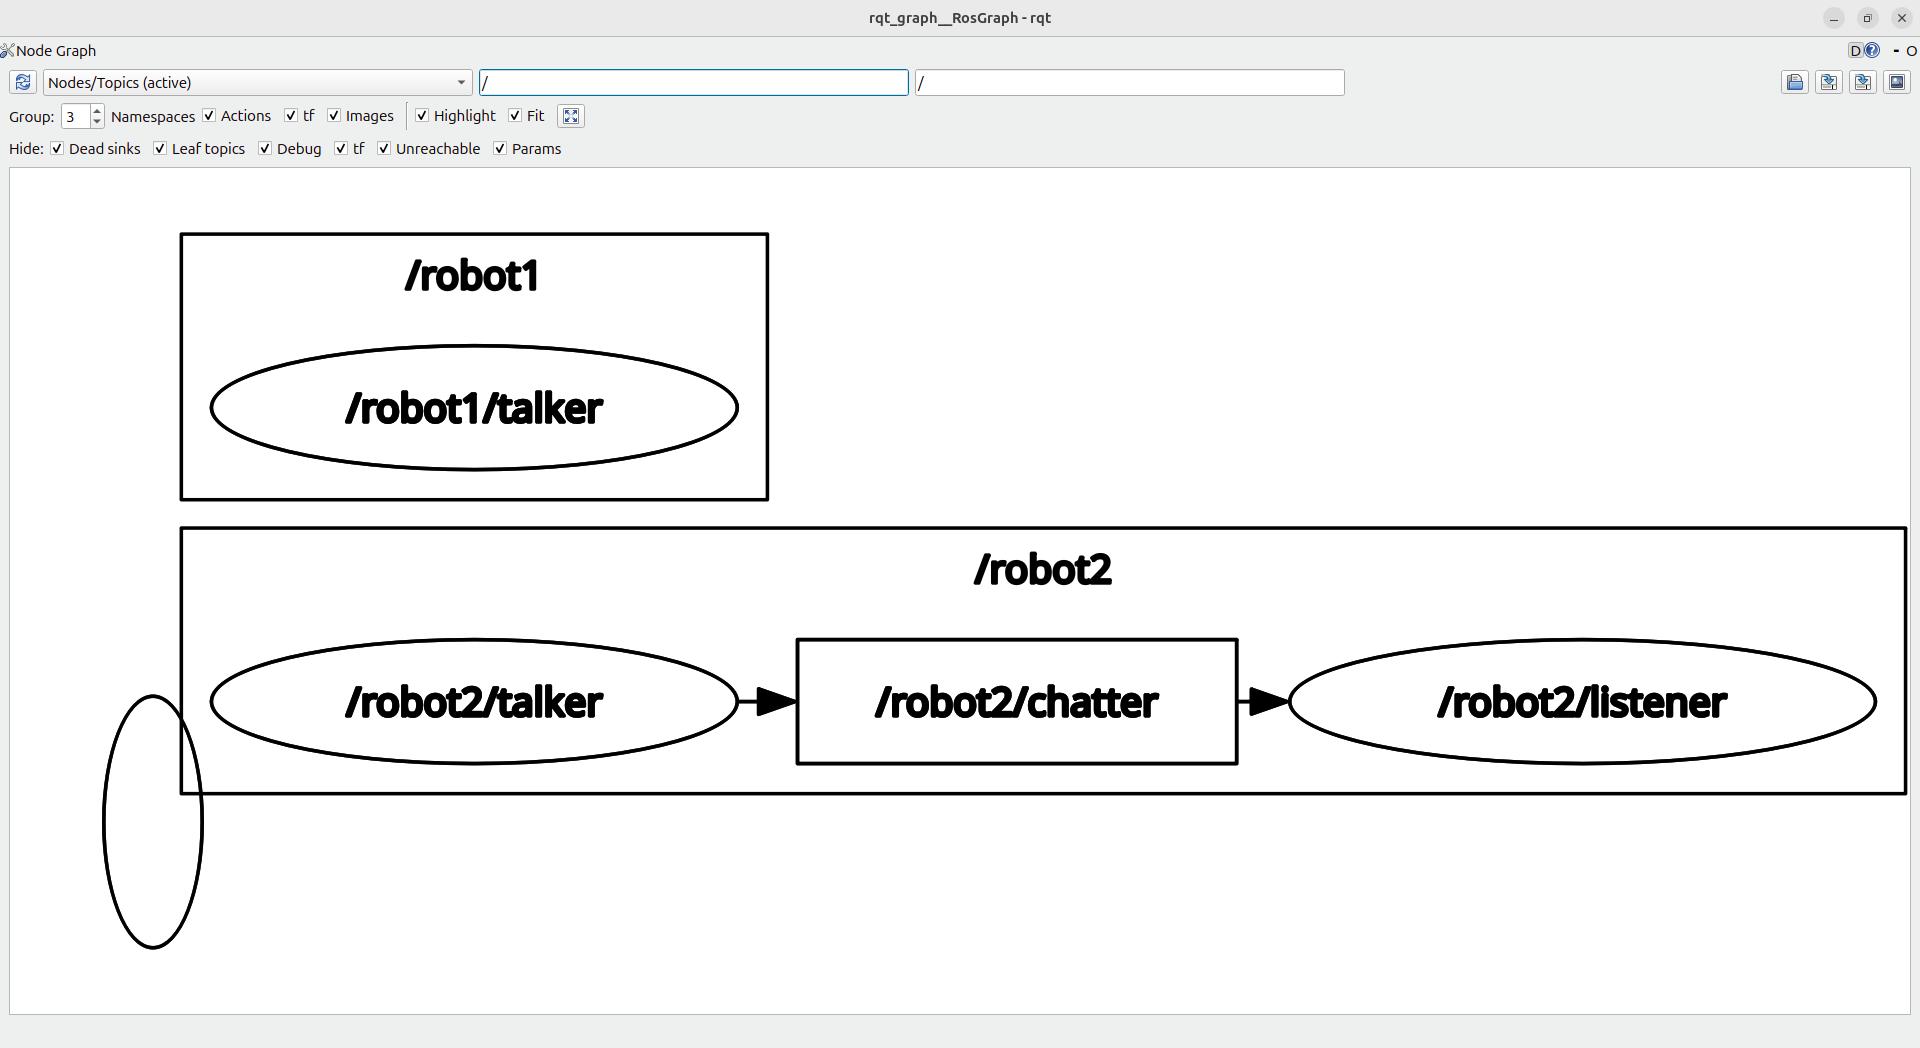
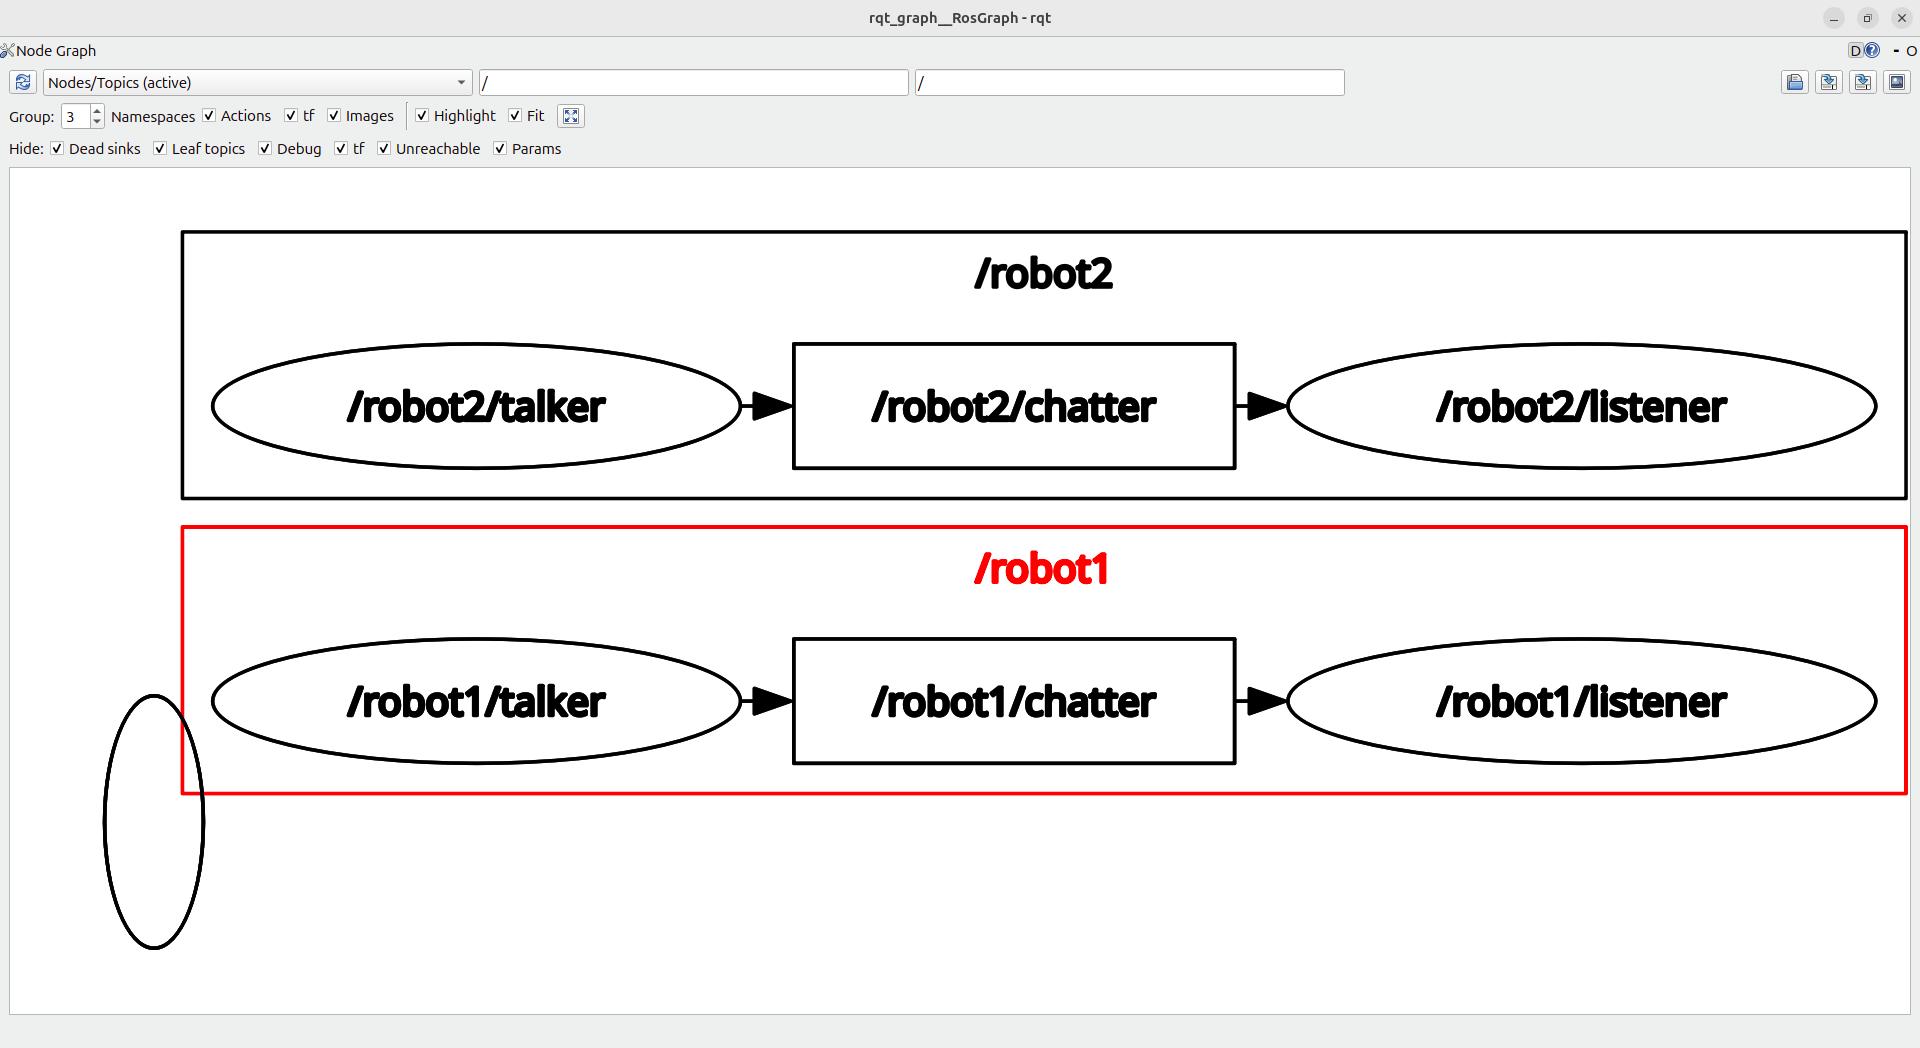
For example, in the scenario from the previous section where each pair of talker and listener nodes was launched in their respective namespaces, rqt_graph clearly shows the separation between the two sets of nodes. You can easily identify which listener is subscribed to which talker by observing the namespaced topic connections:
Note: You can also run
rqt_graphas a view in therqtGUI by selecting it fromPlugins->Introspection->Node Graph.
rqt_graph legend:
- Names in a circle represent nodes.
- Names in a rectangle represent topics.
- Arrows show the data stream flow between nodes.
By hovering the mouse cursor over a node or a topic, you can highlight all of its connected entities.
Conclusions
In this tutorial, we explored the concept of node names and namespaces in ROS 2. You learned how namespaces can be used to organize and isolate nodes, topics, and services, allowing for better modularity and reduced naming conflicts in complex robotic systems. We also demonstrated how to run nodes with specific names and namespaces, visualize the ROS 2 graph using rqt_graph, and use topic name remapping to subscribe to topics across different namespaces.
Understanding and effectively using node names and namespaces is crucial for developing robust ROS 2 applications, especially when dealing with multiple robots or components. By leveraging these concepts, you can enhance the overall organization and clarity of your robotic systems.